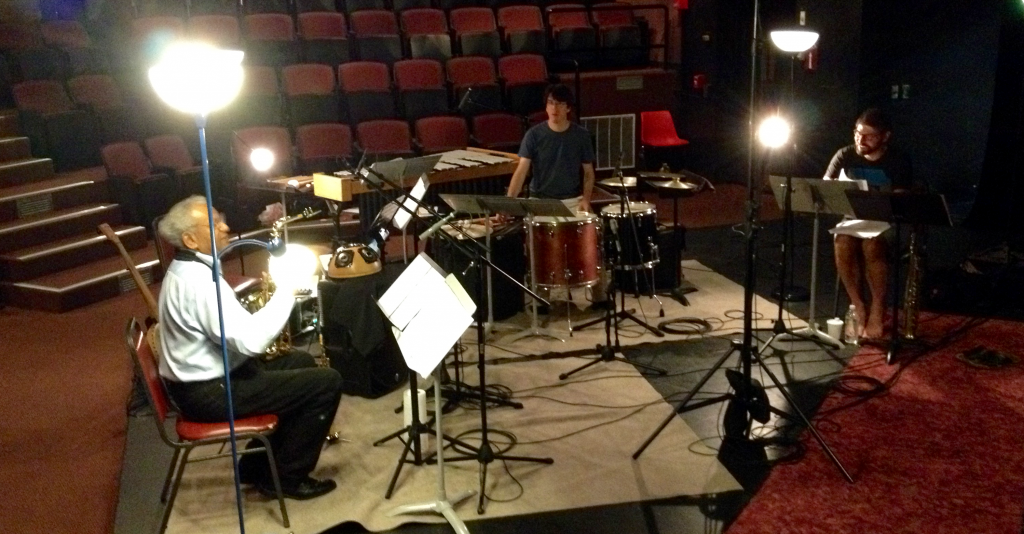
Last week I had the privilege of recording as part of a quartet with Anthony Braxton, Andrew Dewar and Tim Feeney. Braxton brought in four new pieces that explored novel ways for the four of us to work together, each piece proceeding a little further into the unknown. The sessions were intense—demanding focus and attention to the notation while also requiring us to be flexible and adventurous improvisers. An amazing experience.
Tag Archives: studio
Wind Whistling in Overhead Wires: Soundtrack Companion to The Observers
Wind Whistling in Overhead Wires is a collection of field recordings and outtakes from my work on Jacqueline Goss’s film The Observers.
This is a pay-what-you-wish (starting at free!), digital download release on Bandcamp. I made the field recordings during our two amazing shoots at the top of Mt. Washington in New Hampshire (see these previous posts). I processed some of the sounds using custom effects developed with Cycling 74’s Max software and added a few instruments in the studio. I chose my favorite sounds and sketches that didn’t make it into the final film and sequenced them to create a continuous 20-minute piece (though some of the tracks work well on their own, particularly Downslope Flow). Enjoy!
Studio Gets the Treatment – Part 2
This is the second of a two part post about my recent studio remodel and acoustic treatment. Read the first part here.
Once all the acoustic treatment was installed and the furniture was moved back in, I took another series of audio measurements. All my measurements are quasi-scientific, using materials I had on hand: a Max patch to generate test tones, a home-built omni mic, a spreadsheet. I only tested the frequency response for lower frequencies (20 Hz to approximately 350 Hz). I made no attempt to measure the reverberant response of the room (RT60). Given these limitations, the data nonetheless show a clear improvement in frequency response in the room.
Test Results
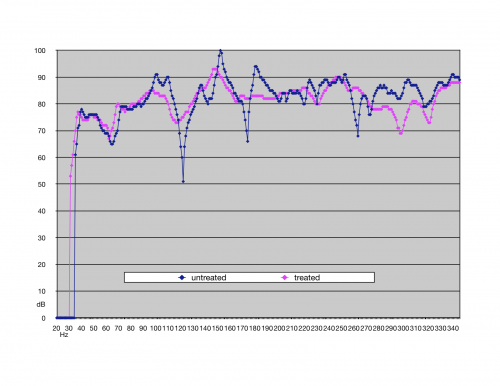
My goal was to flatten the frequency response of the room, knowing that a perfectly flat response isn’t practical given the dimensions of the room (or of my wallet). The chart above shows a range of approximately 50 dB in the untreated room, with the lowest reading of 51 dB at 122 Hz and the highest reading of 100 dB at 151 Hz. After the treatment was installed the range is approximately halved to 26 dB, from 67 dB at 62 Hz to to 93 dB at 148 Hz.
One unanticipated difference between the tests is the difference in low frequency readings. In the untreated room, my sound level meter registered nothing below 35 Hz. Once the room was treated, the meter picked up readings beginning at 31 Hz. This bass extension may be due to my ad hoc test equipment, but I seem to hear it.
Listening tests in the treated room were revelatory. Overall bass response is noticeably more even. Much more striking for me is how much the stereo imaging has improved in the treated room. The soundstage seems more defined and both wider and deeper. I’m shocked by how much improved even older stereo mixes sound in the treated room.
Listening to the Beatles “A Day in the Life” in the untreated room I felt like I heard the hard-panned mix just fine, despite some muddiness and boominess in the toms. In the treated room, the toms are clearer and more even, as expected, but even the hard-panned stereo image is more defined. Many tracks in the untreated room suffered from the “hole in the middle” syndrome, whereas in the treated room the sounds are more evenly distributed. I noted that Miles Davis’ “So What” seemed to have good imaging between the bass and trumpet in the untreated room. Listening to it with the acoustic treatment installed I can hear more than just the separation between the instruments–I can hear the sound of the room the instruments were recorded in.
Not Going Back
Remodeling my studio disrupted my work and schedule, but the results are well worth it. Even though it seems pedestrian to spend time and money on acoustic panels rather than boutique microphone preamps or the fashionable plugin du jour, I’ll continue to choose the former over the latter. I’ll never work in an untreated room again.
Studio Gets the Treatment – Part 1
One of my goals when I moved to Albany was to set up a good-sounding room for my studio. I had done enough recording in my previous spaces to realize that the biggest limiting factor for me to capture a good sound had become the acoustics of the room itself. Sure, I’d still love a boutique preamp and collection of the finest mics, but they can’t overcome the properties of physics at work in a poorly designed acoustical space.
My original plan was to treat my new studio before unpacking from our move, but there were more pressing renovation projects around the house: roof, kitchen, two baths, and nearly every other room but my studio. I also had various projects that required immediate work recording and editing sounds, so I unpacked and set up what I hoped would be a temporary studio.
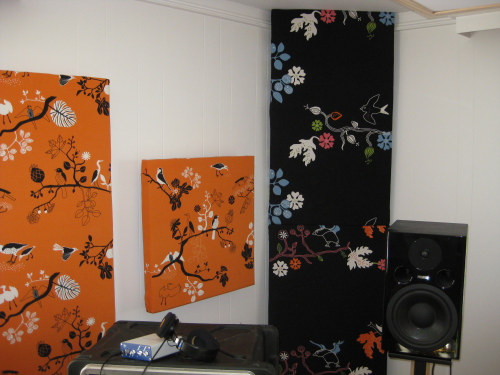
Two years later I was still working in an untreated room, so I finally made a plan for the acoustic treatment I needed. I used Mitch Gallagher’s book Acoustic Design for the Home Studio as a starting point for my plans. Soon after, I began building some broadband absorbers. I followed the well-known technique of using rigid fiberglass panels–gift wrapping each one in funky, bright IKEA fabric chosen by my wife. The panels then languished in my basement for almost another year before I was able to pack away everything in the studio and clear the room for painting and installation.
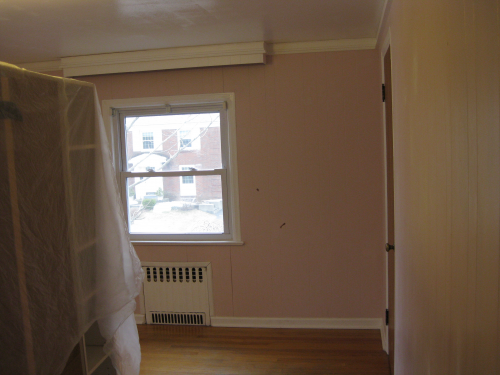
While the room was empty and untreated I took a series of audio measurements which confirmed the laws of physics–modes predicted by the dimensions of the room–and my own experience recording and mixing. I conducted a series of listening tests using familiar musical material. (More on these test results in Part 2.) Clapping in the empty room produced that characteristic boxy sound with fluttery echoes.
After installing only half of the wall panels I already noticed a significant difference in the sound of the room: now the echo I heard when clapping seemed to come from the hallway outside the room rather than the room itself. The broadband absorbers were clearly working.
Mounting the Panels
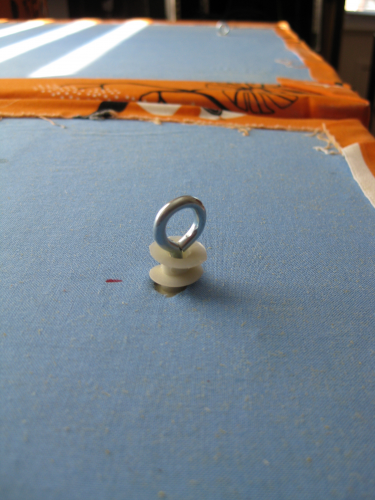
For wall-mounted panels I screwed eye hooks into drywall mounts which screwed easily by hand into the rigid fiberglass. With a little picture wire it was a simple matter to hang them from a nail in the wall. To increase bass absorption, I velcroed 2″ or 4″ spacers cut from scrap wood to the back of some of the panels.
For ceiling-mounted panels I built simple wooden frames that were hung from eye hooks mounted in the ceiling.
Retweeting. No, really.
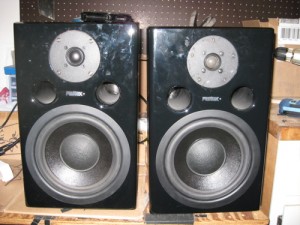
A few months ago I blew a tweeter on one of my Fostex PM2 MkII monitors. What should have been a simple repair turned into a marathon. First, Fostex recently sold all support and distribution to a new US company who was slow to respond to repair inquiries due to the backlog created during the handover. They finally came through with a list of local(ish) authorized dealers/repair sites. The closest of which was a known and trusted music shop who never returned my calls–I guess they’re doing fine in this economy. So I struck out on my own. Given my limited budget, doing it myself seemed like the best approach anyway.
After a few consultations with the excellent tech team at iEAR, I had the tweeter removed, verified that it was indeed the problem, and gathered enough information to purchase replacements. I then headed over to Madisound to choose replacement tweeters. Support at Madisound was exemplary–a quick phone call yielded a handful of recommendations for replacement tweeters.
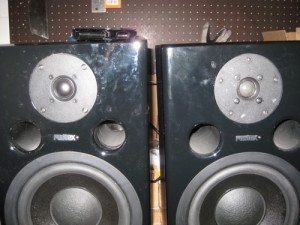
I opted for the SEAS Prestige 27TDF (H1211) tweeter. I’m no audiophile speaker-building veteran, nor could I reasonably measure the frequency response of the factory tweeters. So my choice was determined by finding the closest physical match of diaphragm size, outside diameter, etc. Oh, and budget was a concern, too. I could have spent more on tweeters than I paid for the monitors themselves. $33 each seemed about right. I bought two, realizing that the likelihood of a perfect match was slim–the goal was to replace both tweeters with acceptable sounding units.
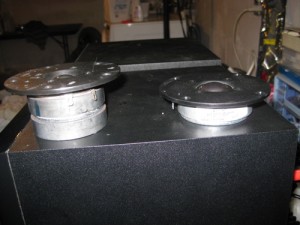
Installing the tweeters was mostly straightforward. I used my trusty dremel to carve out a little space in the opening for the new tweeters’ connectors. The only mystery was the polarity of the wires going to the tweeters. I connected the tweeter both ways and listened for differences. The correct wiring was readily apparent: upper mid frequencies all but disappeared when the polarity was reversed.
So, how do the new tweeters compare to the factory tweeters? On the whole, favorably. They’re noticeably quieter; I had to increase the tweeter gain by about 7 dB to get the new tweeter to match the factory unit. Their performance is less consistent at lower volume levels, with the lower range of the tweeter much less prominent when listening at lower volumes. But when I turn up the volume the response flattens out considerably and the difference between the tweeters becomes almost imperceptible. One reason I liked the Fostex monitors to begin with was their balanced sound at low listening levels. I’m disappointed to lose some of that clarity, but pleased that the speakers’ overall character is not radically changed when listening at more typical levels.
I’ve been listening and mixing with the retweeted speakers for about 10 days now and I feel like my old monitors are back in the studio.