Salad Bowl Hemi Speaker #2

I recently completed my second salad bowl hemi speaker. (See info on the first one here, including links to the Princeton and Stanford laptop orchestras which provided excellent guides to construction.) My second speaker followed the design and construction of the first very closely, with the substitution of Polk Audio DB401 speakers. The Polk speakers were significantly cheaper than the Infinity speakers. I haven’t directly compared the speakers, but I remember the Infinity speakers to be heavier and louder than the Polk speakers. The frequency response of both seems very similar. I do prefer the mounting tabs on the Infinity speakers to the broad flange on the Polk speakers. When mounting them on a hemispherical surface, the Polk speaker flanges don’t lie quite as flat (er…curved).

Here are some photos I took during construction.
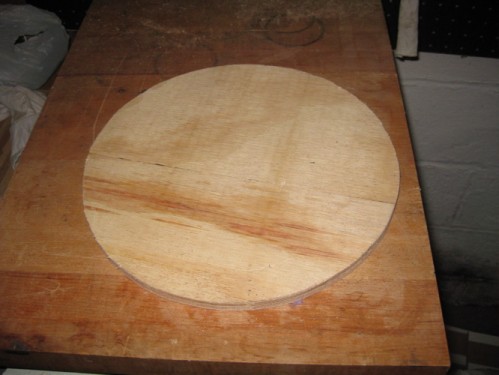

This is the bottom of the speaker. I simply scribed the circumference of the bowl on a piece of 1/2″ plywood and cut out the circle using a jigsaw.

Salad bowl with speaker holes marked and taped

Salad bowl with speaker holes marked and taped

Here’s the bowl with the position of each speaker marked and taped. If you look closely you can see a small red mark at the center of each circle. I used a string attached to the center of the bowl to mark the center of all the equatorial speakers. The tape is simply to prevent the bottom of my jigsaw from scarring the surface of the bowl.
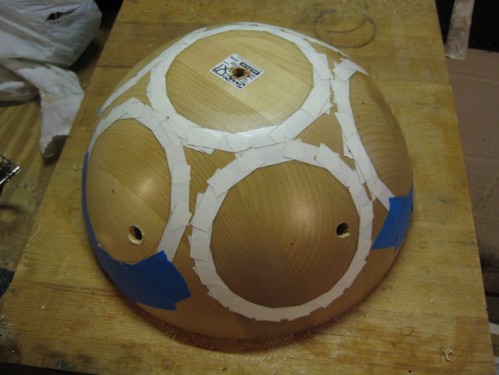
Salad bowl with holes drilled for jigsaw blade

Salad bowl with holes drilled for jigsaw blade

Next I drilled holes in each speaker cutout large enough to fit the blade of my jigsaw.
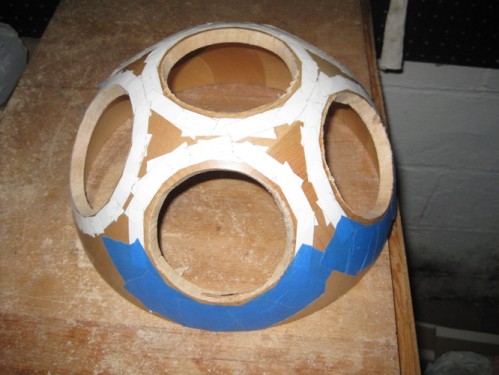
Salad bowl with speaker holes

Salad bowl with speaker holes

Here’s the bowl with all the speaker holes cut. It’s easy to crack the salad bowl after removing so much of the material, so take care with all subsequent drilling and cutting.
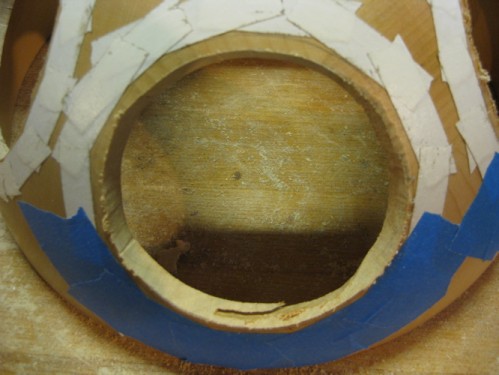
Detail of cut used to enlarge back of speaker opening

Detail of cut used to enlarge back of speaker opening

One result of working with the elliptical geometry of a hemisphere is that the back side of the holes we cut is slightly smaller than the front side. This might prevent your speakers from sitting flush against the surface. I only needed to trim a few places from the back of each circle to get the Infinity speakers to mount flush, but I had to cut the entire back edge of each opening in order to mount the Polk speakers.

Finished hemi showing knobs and connections

Finished hemi showing knobs and connections

Here’s the finished speaker. (I know, I skipped plenty of intervening steps! I was having too much fun putting all the pieces together to stop and take pictures.) The volume knobs (one for each stereo amp) are on the left. In the middle is the power connector. On the right is a 6-conductor Neutrik connector for all the audio signals.

Finished hemi on top of subwoofer

Finished hemi on top of subwoofer

A front view of the finished speaker. It’s sitting on top of a Sony subwoofer I picked up at a yard sale. The two together have a nice R2-unit look. I’ve set the crossover fairly high (around 300Hz). I expect I’ll back it down after some more listening tests.

I’ve already performed once with this hemi. So far, the biggest problem I’ve encountered is having the amps cut out on me when the input levels get too high. The Dayton amps seem to have a protection circuit that shuts them down when they’re driven too hard. It’s better than having the amps blow up, to be sure, but a bit of a drag having the audio suddenly drop out. Sending the low frequency signals to the sub seems to ease the load placed on the hemi amps. I’ve also been experimenting with limiters and high-ratio compressors, but I haven’t yet found the silver bullet. I’ve only scratched the surface of spatialization possibilities with this setup, and I’m looking forward to working with it even more.


More Wichita Mind Control

Jason Cosco was kind enough to post a video of me performing Wichita Mind Control for bent electronics with MaxMSP at the Upstate Artist’s Guild Gallery last April. This was the premiere performance of the piece. Though my pieces often changes incrementally (or sometimes substantially) as I continue to perform them, this first shot at WMC still feels definitive to me.

Here’s audio of the same performance (previously posted here)

[audio:wichita_mind_control_estate_capital.mp3]

Wichita Mind Control – Estate Capital

Holland Hopson at Signatures – Art Night at Proctors

I’ve been remiss posting about this event, but below is a last-minute blurb. If all goes well, this will be the premiere of my new 6-channel hemispherical speaker. I’ll post more on that project soon.

Art Night at Proctors Flyer

Art Night at Proctors Flyer

Holland Hopson plays music for banjo and electronics at Signatures Wine Bar, Proctors in Schenectady on Friday December 18th, 5:30pm – 9pm.

Holland’s music for banjo expands traditional Appalachian tunes and techniques with live interactive electronics. Expect a mix of old-time banjo music and ambient electronic improvisations–Roots music for the 21st century. Holland was last seen at Proctors opening for kraut rock legends Faust.

Friday’s performance is part of Art Night at Proctors.

“…vocalist-banjo player Holland Hopson magnificently melded old-timey roots music with 21st century technology…”
–Greg Haymes, The Albany Times Union

One Month to the Mountain

Late Afternoon Cogs Heads Down, Photo by Jeff Glover

I’m headed to the top of Mt. Washington in about a month. I’ll be recording audio for an experimental documentary project led by Jacqueline Goss. At Jackie’s request I’ve been reading material on the history and operation of the Mt. Washington Observatory. I’m already having fun geeking out about cloud cover and wind speed and fog and rime.

Jacqueline Goss, from The 100th Undone

Still trying to figure out how to actually record usable sound in 50mph wind… I’m currently building a handful of DIY contact mics/hydrophones in anticipation of recording ice accumulation and the straining of various summit structures in full-on gales. I’m also building a few electret omni mics so I can have something to take outside with impunity in the worst conditions. I’ll try to post some photos of my homebrew audio projects. Also look for future reports and audio samples from the mountain top.

Retweeting. No, really.

A few months ago I blew a tweeter on one of my Fostex PM2 MkII monitors. What should have been a simple repair turned into a marathon. First, Fostex recently sold all support and distribution to a new US company who was slow to respond to repair inquiries due to the backlog created during the handover. They finally came through with a list of local(ish) authorized dealers/repair sites. The closest of which was a known and trusted music shop who never returned my calls–I guess they’re doing fine in this economy. So I struck out on my own. Given my limited budget, doing it myself seemed like the best approach anyway.

After a few consultations with the excellent tech team at iEAR, I had the tweeter removed, verified that it was indeed the problem, and gathered enough information to purchase replacements. I then headed over to Madisound to choose replacement tweeters. Support at Madisound was exemplary–a quick phone call yielded a handful of recommendations for replacement tweeters.

I opted for the SEAS Prestige 27TDF (H1211) tweeter. I’m no audiophile speaker-building veteran, nor could I reasonably measure the frequency response of the factory tweeters. So my choice was determined by finding the closest physical match of diaphragm size, outside diameter, etc. Oh, and budget was a concern, too. I could have spent more on tweeters than I paid for the monitors themselves. $33 each seemed about right. I bought two, realizing that the likelihood of a perfect match was slim–the goal was to replace both tweeters with acceptable sounding units.

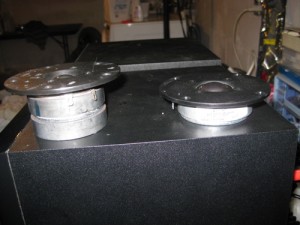
Old. vs. New. The factory tweeter is on the left. The SEAS replacement is on the right.

Old. vs. New. The factory tweeter is on the left. The SEAS replacement is on the right.

Installing the tweeters was mostly straightforward. I used my trusty dremel to carve out a little space in the opening for the new tweeters’ connectors. The only mystery was the polarity of the wires going to the tweeters. I connected the tweeter both ways and listened for differences. The correct wiring was readily apparent: upper mid frequencies all but disappeared when the polarity was reversed.

So, how do the new tweeters compare to the factory tweeters? On the whole, favorably. They’re noticeably quieter; I had to increase the tweeter gain by about 7 dB to get the new tweeter to match the factory unit. Their performance is less consistent at lower volume levels, with the lower range of the tweeter much less prominent when listening at lower volumes. But when I turn up the volume the response flattens out considerably and the difference between the tweeters becomes almost imperceptible. One reason I liked the Fostex monitors to begin with was their balanced sound at low listening levels. I’m disappointed to lose some of that clarity, but pleased that the speakers’ overall character is not radically changed when listening at more typical levels.

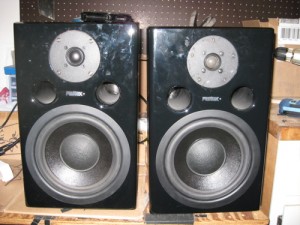
Here are the speakers on my workbench with a new tweeter installed on the left and the old one on the right.

Here are the speakers on my workbench with a new tweeter installed on the left and the old one on the right.

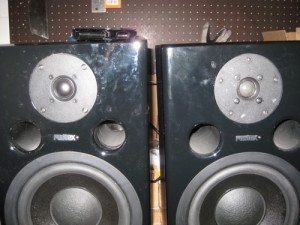
Close up shot showin the new tweeter on the left and the old one on the right.

Close up shot showing the new tweeter on the left and the old one on the right.

I’ve been listening and mixing with the retweeted speakers for about 10 days now and I feel like my old monitors are back in the studio.

Making Tracks for the TrackBox

I saw this “cyber” Monday special from audioMIDI.com: Nomad Factory’s Blue Tubes Trackbox for $15 (expires Sunday 12/6). I downloaded it to see if it might replace the TubeMP 12AX7 tube preamp I use between my banjos and audio interface. I use the preamp to soften the tone of the admittedly harsh piezo contact mics I use on my banjos. Driving the tube a little harder provides some welcome compression and the limiter helps tame the spiky sounds from a piezo on a frailed banjo.

In my initial tests, I’ve been pleasantly surprised with how well the TrackBox nails the tube sound–a little goes a long way. And the 4-band parametric equalizer seems eminently usable. Testing it as a VST in Max 5 it used about 7% of my CPU (an aging PowerPC G4) with all the bells and whistles turned on and was closer to 4% with only the tube and EQ running.

I’m not convinced I’ll leave my tube hardware at home just yet–without a hardware limiter in front of my audio interface I  have to drop the input level significantly to avoid clipping. By the time I’ve pulled the level back up I’ve also introduced some noise. The tone-shaping potential of the EQ and compressor might be worth it, especially if I need to travel light. In the meantime, it’s nice to have another channel strip color.